Introduction
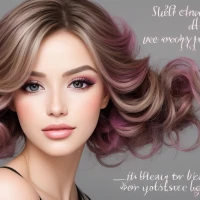
POV beauty — short for point-of-view beauty — is a popular content format where creators film beauty, makeup, and skincare routines from a first-person perspective. This immersive style places the viewer “in the driver’s seat,” increasing engagement and emotional resonance. POV beauty is widely used on TikTok, Instagram Reels, YouTube Shorts, and longer-form platforms because it feels intimate, directive, and highly shareable.
This guide explains everything you need to know about creating professional, scroll-stopping POV beauty content: planning, filming, makeup and skin tips for camera, lighting, audio, editing, posting strategies, product recommendations, troubleshooting, and safety considerations. Whether you’re a beginner creator, a makeup artist wanting to pivot to social video, or a brand planning POV campaigns, this guide will be a practical, bookmarkable resource.
What Is POV Beauty and Why It Works
- Definition: POV beauty is filmed from a first-person perspective, simulating the viewer’s direct interaction with beauty processes — doing a makeup look, applying skincare, or performing a hair routine.
- Why it works:
- High engagement: feels personal and directive (“do this now”).
- Strong hook potential: quick, immersive starts increase retention.
- Versatile: can be ASMR, tutorial, transformation, or comedic.
- Mobile-first: optimized for vertical formats and short attention spans.
Key Terms and Related Keywords
- POV beauty, POV makeup, point-of-view beauty, POV skincare, TikTok POV beauty, cinematic POV, first-person makeup, beauty ASMR.
Tip: Use these terms naturally in captions and metadata for SEO and discoverability.
Planning Your POV Beauty Content
1. Define the concept
- Choose a POV style: instructional (step-by-step), transformation (before/after), ASMR (sound-focused), or storytelling POV (character-driven).
- Identify the core hook — what will make viewers stop scrolling in the first 1–3 seconds.
- Decide the platform and target length (TikTok/Reels: 15–60s; YouTube Shorts: under 60s; YouTube long-form: 4–12min).
2. Script the flow
- Open with the hook or visual payoff.
- Break the routine into 3–6 key steps.
- Plan camera moves & props (brushes, products, towels).
- End with a clear CTA (follow, like, save, shop link).
Note: A loose script keeps the POV feeling authentic while keeping content efficient.
Filming Setup: Camera, Stabilization, and Angles
Camera and devices (comparison)
| Device Type | Pros | Cons | Best For |
|---|---|---|---|
| Smartphone (iPhone/Android) | Portable, excellent stabilization, high-quality video | Limited lens variety | Most creators; quick content |
| Mirrorless (Sony, Canon) | Superior image quality, interchangeable lenses | Heavier, costlier | High-production POV |
| Action Cam (GoPro) | Wide FOV, durable, mounts for head/hand | Distortion, limited low-light | POV movement or hand-mounted shots |
| Vlogging Camera (Sony ZV-E10) | Designed for creators, flip screen | Moderate size | Balanced quality & ease |
Recommended models: iPhone 14/15 Pro, Google Pixel 8/9, Samsung Galaxy S23/S24, Sony ZV-E10, Sony A7C, GoPro Hero 12.
Stabilization & mounting
- Use a handheld gimbal (DJI Osmo Mobile) or small tripod with a flexible arm for steady first-person shots.
- For true POV (head-mounted), use chest mounts or action-cam head straps — but be cautious of shaky footage.
- Maintain consistent distance: 8–18 inches (20–45 cm) from the camera to face/hands for flattering framing.
Important: Avoid obstructing the lens with fingers or products.
Lighting for POV Beauty
Key principles
- Use soft, even light to reduce harsh shadows and texture exaggeration.
- Color balance matters: set lights to daylight (around 5000–5600K) for natural skin tones.
- Avoid mixed lighting (warm room lights + daylight) — it causes color casts.
Recommended setups
- Ring light (18"): Great for evenly lit face and bright catchlights. Use 35–60% power to avoid flattening the features.
- Softbox or LED panel: Use a 1–2 light setup — key light at 45° and fill light or reflector opposite.
- Practical light + diffuser: For a cinematic POV, use an LED panel with diffusion to soften the beam.
Lighting comparison table
| Setup | Softness | Portability | Cost | Best Use |
|---|---|---|---|---|
| Ring light | High | High | Low–Medium | Quick tutorials, close-ups |
| LED panel (Aputure) | Very high | Medium | Medium–High | Professional color accuracy |
| Softbox | High | Low | Medium | Studio POV shoots |
Tip: Use a small reflector or white card to bounce light and reduce under-eye shadows.
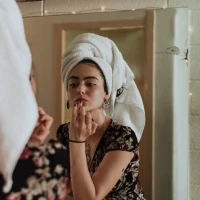
Makeup & Skin Techniques for Camera
Prep: skincare and base
- Cleanse and moisturize 20–30 minutes before shooting.
- Use a lightweight hydrating primer for smoothing pores and improving wear.
- For oily skin: apply a mattifying primer on the T-zone.
- Use a medium coverage foundation — avoids masking expressions while still covering imperfections.
- Set with a finely milled translucent powder; use sparingly under eyes to prevent flashback.
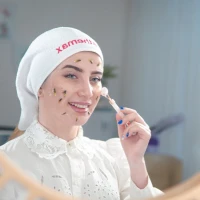
Note: Patch-test any unfamiliar product 48 hours before filming.
Camera-friendly makeup tips
- Avoid SPF-heavy, zinc or titanium-rich products when using bright LED lights; they can cause flashback.
- Use matte or satin finishes on high-definition cameras to reduce skin texture exaggeration.
- Contouring: soft and blended; avoid harsh lines that look unnatural in close-ups.
- Highlighting: use cream/liquid highlighters for a skin-like sheen; avoid chunky glitter.
- Eye makeup: slightly more pigment and contrast than everyday wear to register on camera.
- False lashes or lash extensions enhance the eyes in POV angles.
- Setting spray: lock the look and reduce powdery finish.
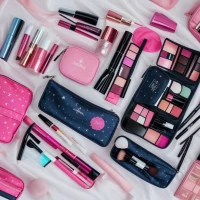
Product recommendations
- Primer: Benefit POREfessional, Smashbox Photo Finish
- Foundation: NARS Natural Radiant, Fenty Pro Filt’r (medium coverage)
- Powder: Laura Mercier Translucent Loose Setting Powder (light-reflecting!)
- Setting spray: Urban Decay All Nighter
- Brushes: Real Techniques, Sigma blending set
- Alternatives: For budget options, e.l.f., NYX, Maybelline.
Audio & ASMR Considerations
- If including voice or ASMR sounds (brush swipes, tapping product lids), use a dedicated microphone:
- On-camera microphone: Rode VideoMic Pro
- USB mic for voiceovers: Shure MV7
- Lavalier: Rode SmartLav+ for hands-free narration
- Record ambient ASMR separately, close to the sound source, and lower background noise in post.
Tip: Sound design increases immersion — subtle mouth sounds or product taps can be highly satisfying.
Step-by-Step: How to Film a POV Beauty Video
- Plan the concept and write a short shot list (3–6 steps).
- Prep your products, brushes, and a clean shooting area.
- Mount your camera/phone at 20–45 cm (8–18 inches) for face POV or 30–50 cm (12–20 inches) for hand/desk POV.
- Set lights to 5000–5600K; position key light slightly above eye level at 45°.
- Set camera to 4K or 1080p at 24–60fps depending on desired look; use 30fps or 60fps for smoother motion.
- Lock exposure and white balance to avoid flicker during shooting.
- Film a short sound test; check for noise and clarity.
- Record each step in short clips (5–20s each) to make editing easier.
- Capture B-roll: product close-ups, texture swatches, before/after frames.
- Back up footage immediately and note any usable takes.
Editing: Apps, Workflow, and Tips
Recommended apps
- Mobile: CapCut, VN, InShot, TikTok editor
- Tablet: LumaFusion
- Desktop: Adobe Premiere Pro, Final Cut Pro
Basic editing workflow
- Import clips and arrange by step.
- Trim to tighter cuts — POV thrives on pace.
- Add jump cuts or match cuts to show progress quickly.
- Stabilize any shaky clips; color correct to match skin tones.
- Add natural sound layers (ASMR taps, brush sounds) subtly.
- Include captions and clear on-screen step labels for accessibility.
- Export at platform-preferred settings (e.g., 1080 x1920 for Reels/Shorts, H.264, 8–12 Mbps).
Pro tip: For featured-snippet style answers, include a fast 3–5 second summary card (e.g., “3 steps to glass skin”) near the start.
Posting Strategy & SEO for POV Beauty
- Titles and captions:
- Use the main keyword “POV beauty” naturally: “POV Beauty: Flawless Glass Skin Routine in 60s.”
- Use long-tail keywords in descriptions: “how to make POV beauty videos for TikTok,” “POV makeup tutorial for oily skin.”
- Hashtags: #POVBeauty #POVMakeup #BeautyTok #MakeupTutorial #ASMRBeauty
- Thumbnail: Clear close-up shot of the transformation moment.
- Caption hooks for voice search and snippets: include short, direct answers (e.g., “How to get glass skin in 3 steps: exfoliate, hydrate, prime”).
- Post timing: test when your audience is active; use platform analytics.
Troubleshooting Common Issues
1. Low light / grainy footage
- Increase ISO only moderately; better to add light than raise ISO.
- Use frame rates of 30fps; higher ISO increases noise.
- If stuck: shoot in RAW or higher bit-rate and denoise in post.
2. Shaky POV shots
- Use a gimbal or small stabilizer.
- Cut into shorter clips and use digital stabilization in editing.
- Practice controlled arm movement when hand-holding.
3. Makeup flashback (white cast from SPF/powders)
- Avoid heavy zinc/titanium SPF under direct LED lights.
- Opt for non-powder or finely milled setting powders.
- Test shots before recording the full take.
4. Color cast / incorrect skin tones
- Lock white balance on your camera or use a grey card reference.
- Color correct in editing; adjust temperature and tint carefully.
5. Poor audio or distracting background noise
- Use a directional mic or lapel and record ambient sound separately.
- Apply a noise gate or denoiser in editing.
Safety, Hygiene, and Legal Considerations
- Hygiene: Use clean brushes, sanitized tools, and single-use applicators when working with clients or multiple people.
- Patch Testing: Advise viewers to patch-test new products 24–48 hours prior to avoid allergic reactions. A 48-hour patch test is standard.
- Lighting Safety: Don’t stare directly into strong LEDs for long periods to avoid eye strain.
- Consent: If filming another person, get explicit consent and release forms for commercial use.
- Ingredient warnings: Avoid providing definitive medical advice; recommend seeking a dermatologist for severe skin issues.
Advanced POV Techniques and Creative Ideas
- Use match cuts to show rapid transformation (e.g., swipe hand over face → replace with made-up face).
- Reverse POV: film from subject to viewer for a conversation-style approach.
- Cinematic b-roll: macro shots of product textures, slow-motion brush strokes (shoot at 60–120fps).
- Interactive POVs: “You’re my makeup artist — do this step” for roleplay engagement.
Product & Tool Recommendations (Quick Reference)
- Cameras: iPhone 15 Pro, Sony ZV-E10, Canon R10
- Stabilizers: DJI Osmo Mobile 6, Zhiyun Smooth 5
- Lights: Neewer 18" ring light, Aputure Amaran 100d
- Microphones: Rode VideoMic Pro, Rode SmartLav+, Shure MV7
- Editors: CapCut, Adobe Premiere Pro, LumaFusion
- Makeup: Smashbox Photo Finish Primer, NARS foundation, Laura Mercier powder, Urban Decay All Nighter spray
FAQ — POV Beauty
Q: What camera settings work best for POV beauty? A: Shoot 1080p–4K at 24–60fps. Use a fixed white balance around 5000–5600K and lock exposure to avoid flicker.
Q: How do I make POV makeup look natural on camera? A: Use medium coverage foundation, diffuse highlighter, soft contour, and avoid SPF-heavy formulas. Test on camera before recording.
Q: What’s the ideal phone distance for a face POV? A: 8–18 inches (20–45 cm) from the camera to face; adjust based on lens focal length to avoid distortion.
Q: How can I add ASMR to POV beauty videos? A: Capture close, clean audio of product taps, brush strokes, and packaging with a lavalier or dedicated mic; mix subtly beneath natural sounds.
Q: Are POV videos good for brands? A: Yes — they humanize products, show real usage, and boost conversions when paired with clear CTAs and product links.
Troubleshooting Checklist (Quick)
- Image too dark: add LED panel or raise ring light brightness.
- Color off: lock white balance and use a grey card.
- Too much skin texture: soften with diffusion or reduce sharpness in post; use light makeup primers.
- Audio muffled: reposition mic or change to directional mic.
- Edit choppy: gather more B-roll and use smoother cuts/transitions.
Related Topics / Further Reading
- How to shoot beauty content for TikTok and Instagram Reels
- ASMR beauty: capturing sound for skincare and makeup videos
- Lighting 101 for makeup artists and beauty creators
- Makeup for camera vs. everyday makeup: key differences
- Video editing basics for creators: CapCut and Premiere Pro workflows
Conclusion and Summary
POV beauty is a powerful, immersive format that turns routine beauty rituals into highly engaging content. This guide covered planning, filming, lighting, camera-appropriate makeup techniques, audio and editing workflows, equipment recommendations, troubleshooting, and safety best practices. Key takeaways:
- Plan a strong hook and concise structure.
- Use soft, daylight-balanced lighting and lock white balance.
- Choose medium-coverage, camera-friendly makeup and avoid heavy SPF under strong LEDs.
- Stabilize your shots and keep camera distance between 8–18 inches for flattering POV framing.
- Prioritize good audio for instruction or ASMR elements.
- Edit tightly for pace, add captions for accessibility, and optimize titles/captions with the keyword “POV beauty.”
Bookmark this guide as a practical playbook for creating consistent, high-quality POV beauty content. With the right planning, gear, and technique, your POV beauty videos can be both beautiful and highly discoverable.
If you’d like, I can create a 30-, 60-, and 90-second POV beauty script template and shot-list tailored to your niche (skincare, bridal, editorial, ASMR). Which niche are you focusing on?